Flashing the Telemetrix firmware
This guide describes how to prepare the Arduino IDE, install the required libraries and flash the Telemetrix4ESP32WIFI firmware on the Arduino Nano ESP32.
Note
Adapted from the official Telemetrix-ESP32 documentation by Alan Yorinks (MrYsLab) — mryslab.github.io/telemetrix-esp32 — to the DAP project and the Arduino Nano ESP32.
Principle
Telemetrix follows a client / server model:
the firmware (server) — a fixed C++ sketch flashed once on the ESP32. It waits for commands over WiFi and returns data to the client;
the Python client — the PyMoDAQ plugin, which sends commands and receives data. No firmware change is needed to change the behaviour.
Communication goes over WiFi (TCP/IP) on port 31336. The ESP32 and the computer must be on the same local network.
1. Install the Arduino IDE
The Arduino IDE is required to compile and upload the firmware. Download the latest version from the official Arduino website for your operating system. You also need a USB-C cable to connect the Arduino Nano ESP32.
2. Add the ESP32 core
The Arduino IDE does not support the ESP32 natively; add the core through the boards manager.
Open File → Preferences.
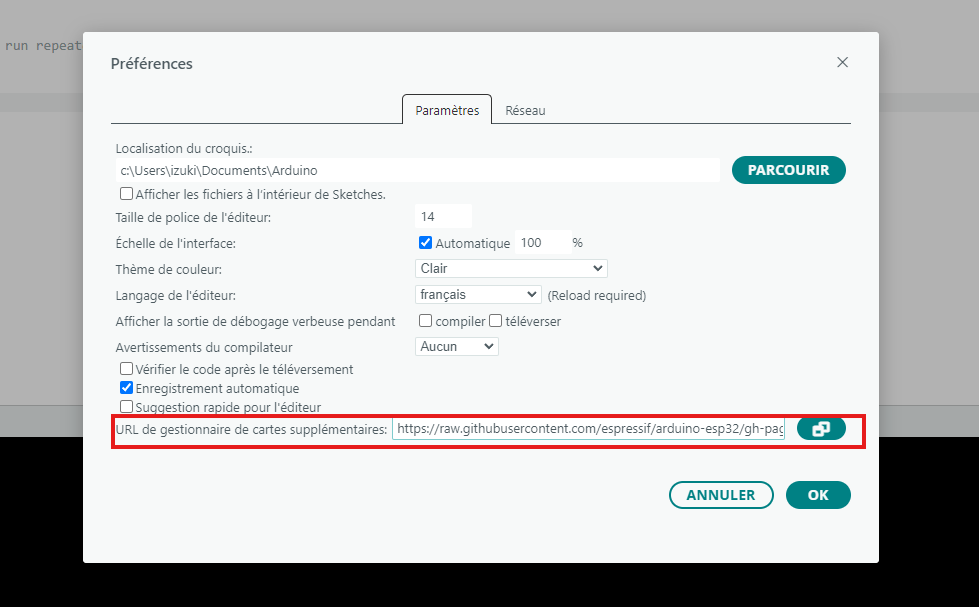
In Additional boards manager URLs, paste:
https://raw.githubusercontent.com/espressif/arduino-esp32/gh-pages/package_esp32_index.json
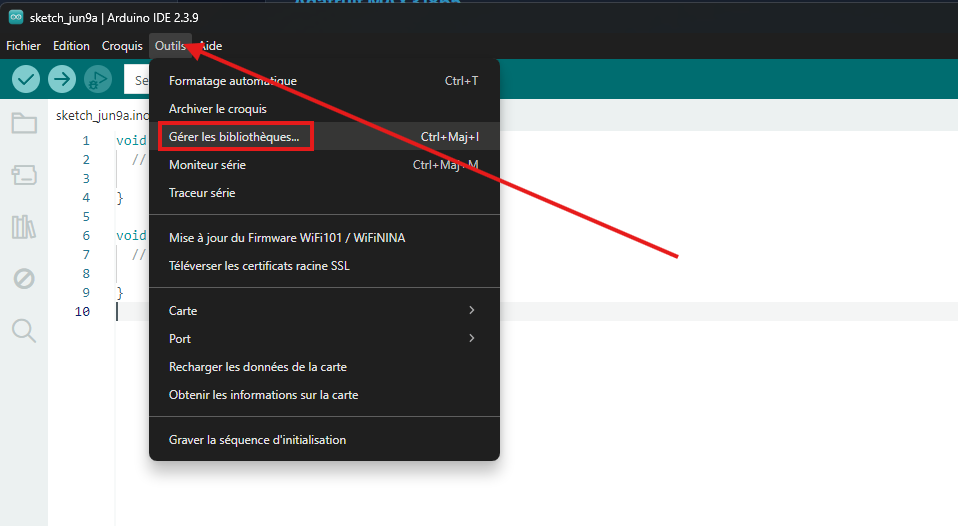
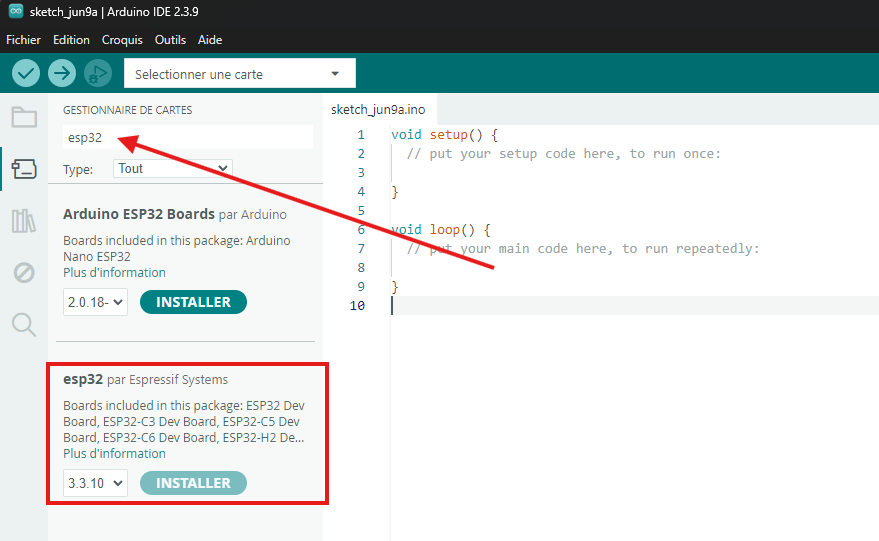
Open Tools → Board → Boards Manager, search for
esp32and install esp32 by Espressif Systems.
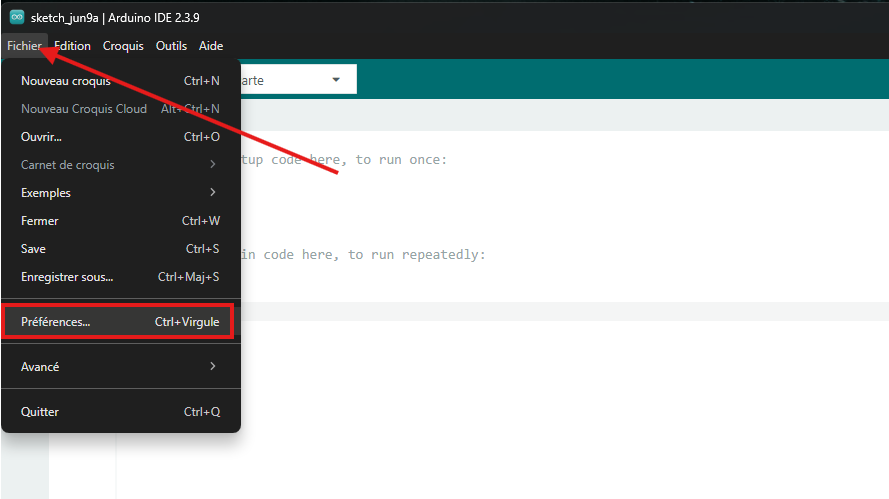
Adding the ESP32 boards-manager URL in the Preferences.
Installing the esp32 by Espressif Systems package.
Warning
The project uses the ESP32 core version 3.3.7. Check the installed version in the boards manager — a different version may break compatibility with the Telemetrix firmware.
3. Install the firmware
Download the Telemetrix4Esp32WIFI firmware file (right-click → Save link as), then
double-click it to open it directly in the Arduino IDE.

The firmware sketch opened in the Arduino IDE.
Install the required libraries from Tools → Manage Libraries (search Telemetrix4Esp32
and install its dependencies when prompted).
Installing the Telemetrix library and its dependencies.

Accept the installation of the dependencies.
Warning
The downloaded file is a modified version of the official firmware. Do not install it through the Library Manager — use the downloaded file only.
4. Configure the sketch
All the options are grouped at the top of the file as commented #define lines, next to
the WiFi credentials. Uncomment a line to activate the corresponding option.
WiFi credentials — set the SSID and password of the local network:
const char *ssid     = "NETWORK_NAME";
const char *password = "PASSWORD";
Network mode — by default the board obtains its IP address from the router (DHCP). To
give it a fixed address instead, uncomment USE_STATIC_IP and adjust the addresses to
match the local network:
#define USE_STATIC_IP 1

#ifdef USE_STATIC_IP
IPAddress local_IP(192, 168, 1, 50);
IPAddress gateway(192, 168, 1, 1);
IPAddress subnet(255, 255, 255, 0);
#endif
I2C / SPI pins — when the Python client does not select the pins itself, the firmware uses the pins defined at the top of the sketch. Uncomment and adjust them to match the wiring of the board:
// #define I2C_SDA_PIN 21
// #define I2C_SCL_PIN 22

// #define SPI_SCK_PIN 18
// #define SPI_MISO_PIN 19
// #define SPI_MOSI_PIN 23
Note
For the wiring used in this project (see Experimental setup), the SPI pins of the
Arduino Nano ESP32 are SCK = GPIO13, MISO = GPIO12 and MOSI = GPIO11.
Check the remaining feature flags as described in the sketch header, then compile.
Checking the feature flags before compiling.

Selecting the board / port and uploading the firmware.
5. Get the board IP address
After upload, open the Serial Monitor: the ESP32 prints the IP address it obtained on
the network (or the fixed address if USE_STATIC_IP is enabled). Note it down — it is
the address you will enter in the PyMoDAQ plugins.
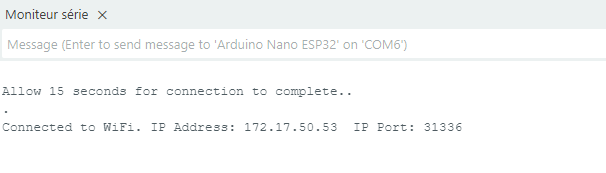
The ESP32 prints its IP address in the Serial Monitor.